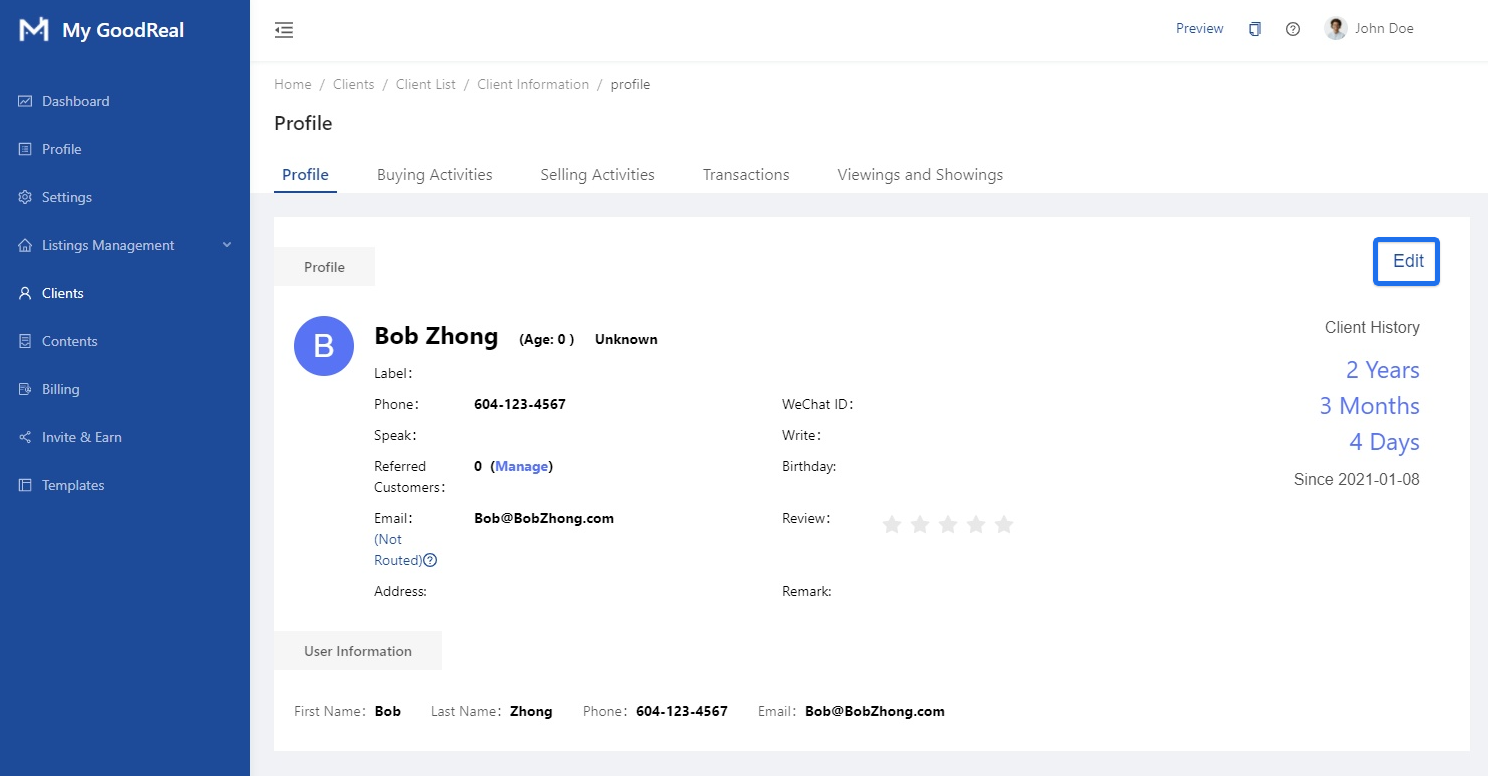
You can view your client's full profile after clicking Edit Details on a select client in your Clients List.
Click Edit to change information, such as Name, Gender, Phone, Email, Address, as well as to Manage Referred Customers, provide Reviews, write Remarks, and check the number of days the user has registered.
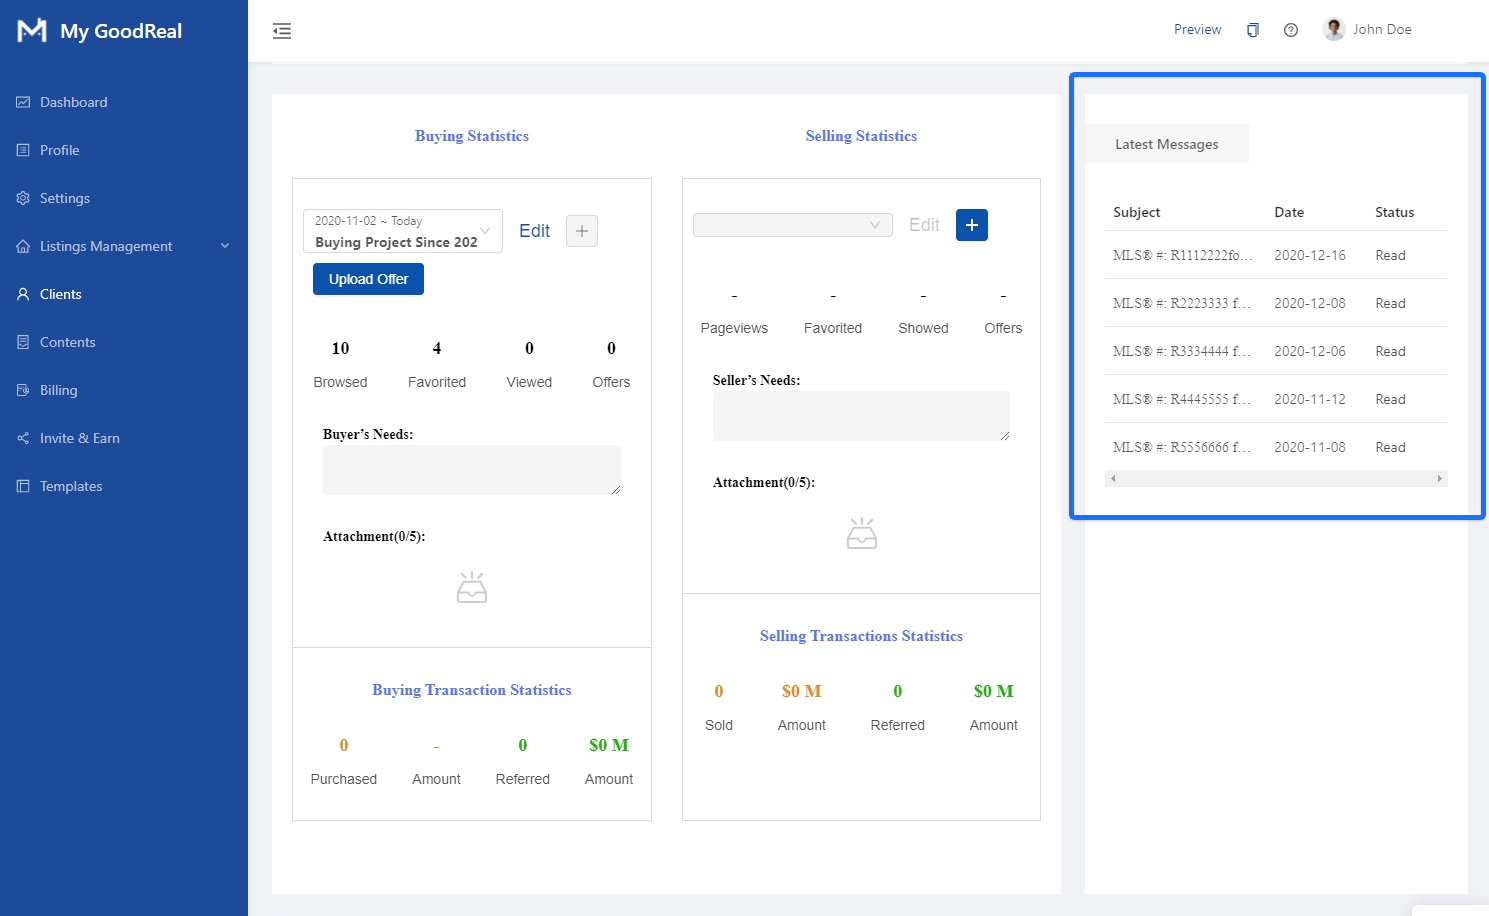
Buying and Selling Statistics
You can view statistics for buying and selling houses, and click the drop-down menu to specify the time range.
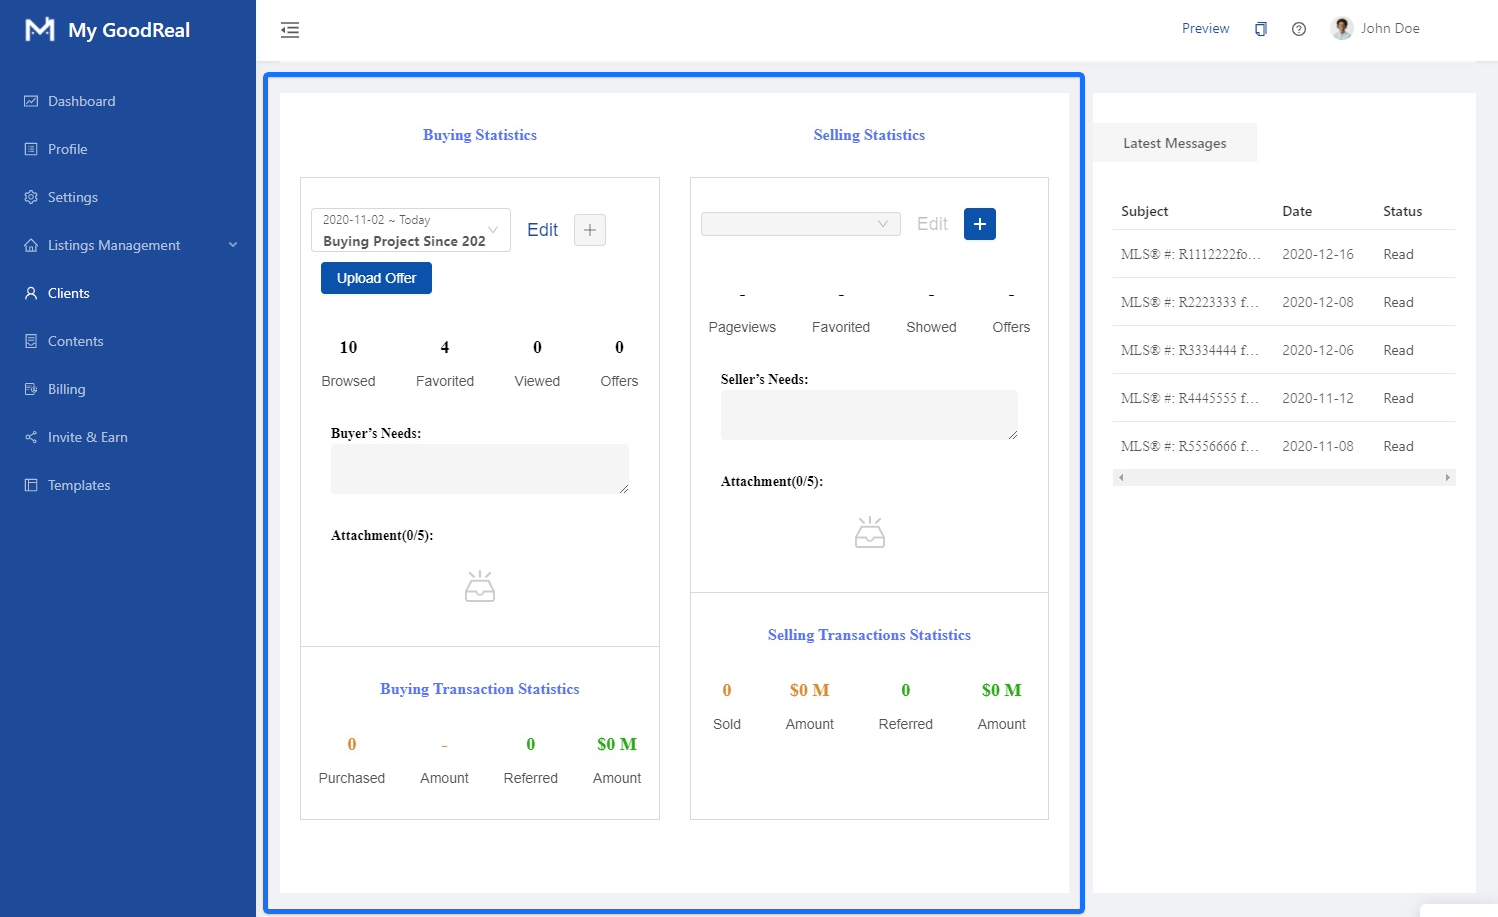
Buying Statistics
You can view the user’s house buying behavior during a specified time period, such as the listings browsed, favorited, and viewed, as well as how many offers were made. This data is generated based on the time period you choose. Be sure to specify the End Date in the time period. The End Date must be at a later date than the Start Date.
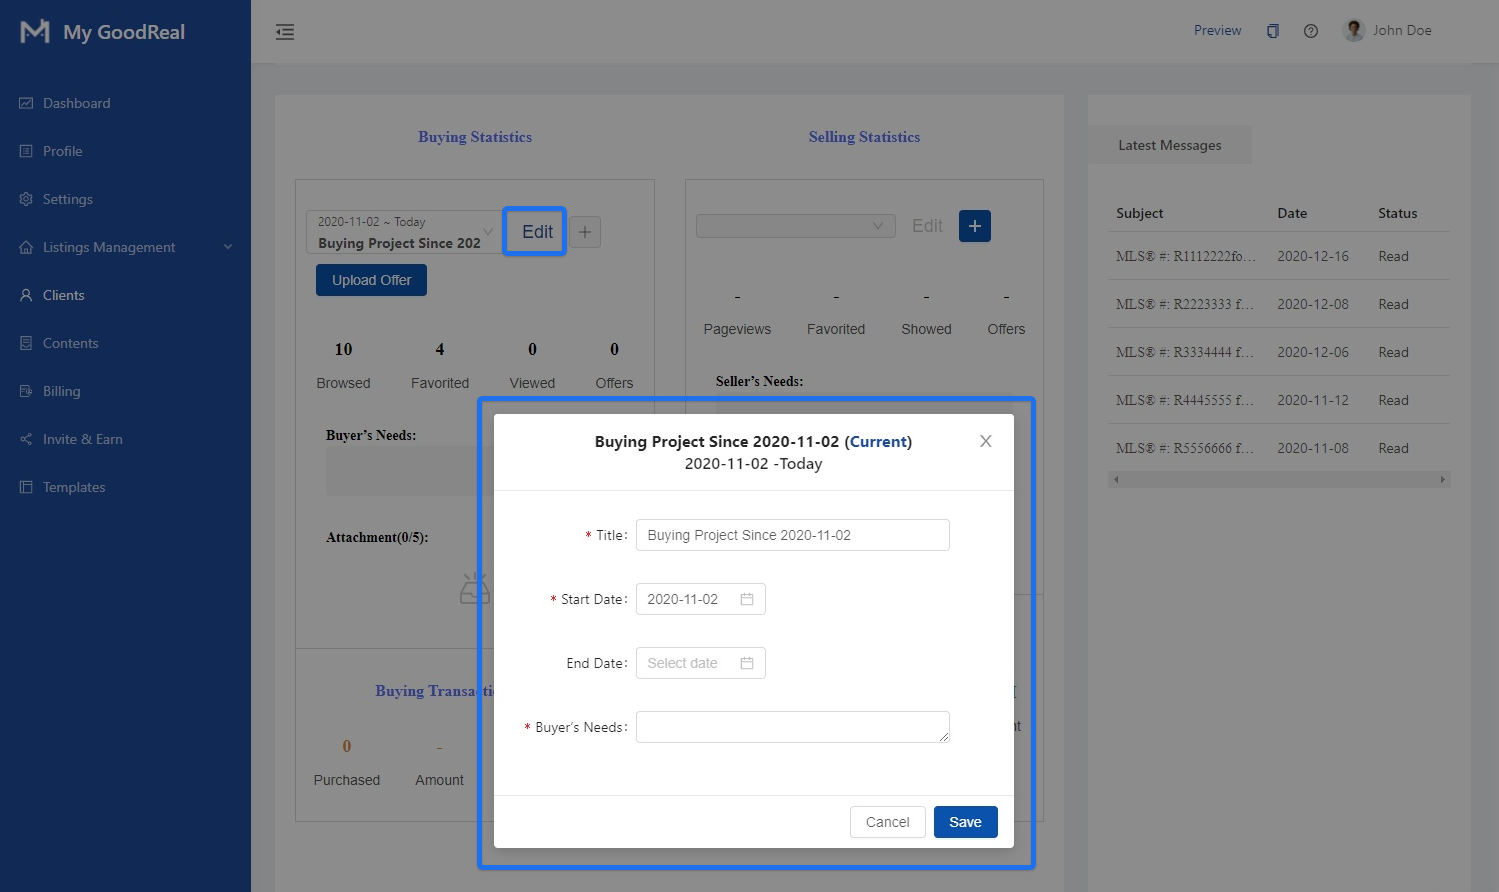
Click Edit to enter the Title, Start Date, End Date, and Buyer’s Needs.
Note: If there is an unfinished buying project, you cannot add a new project for buying a house.
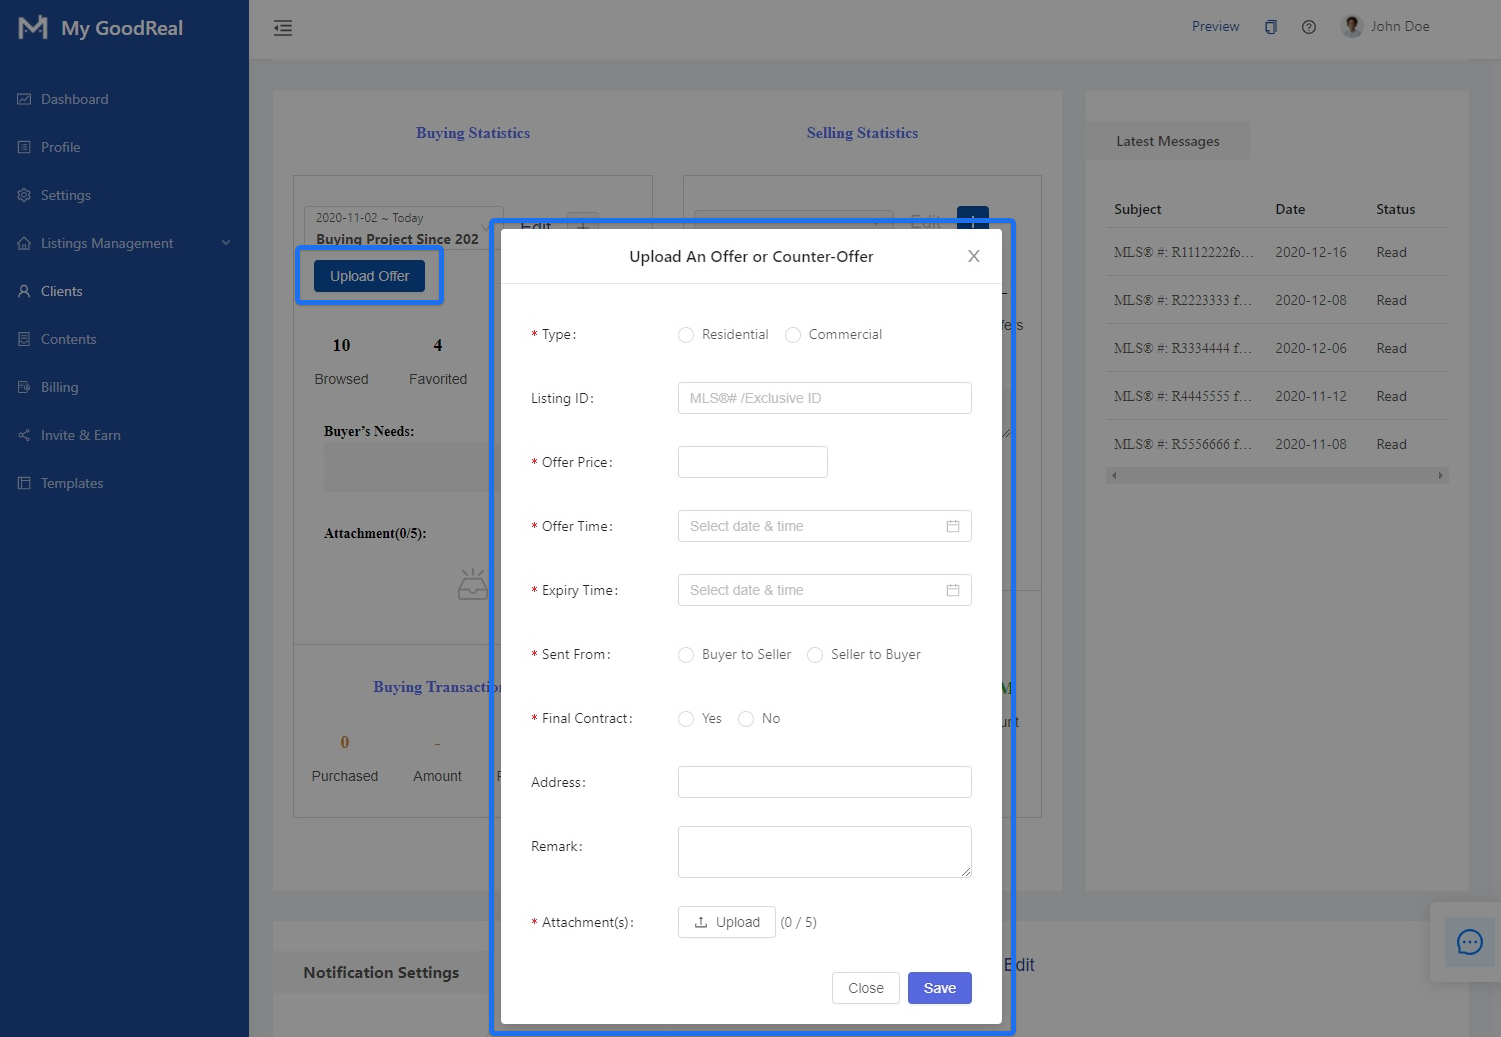
Upload an Offer or Counter-Offer
Select the corresponding Buying Project and click Upload Offer. Choose the Type (Residential or Commercial), Sent From (Buyer to Seller or Seller to Buyer), and Final Contract (Yes or No). Enter the Listing ID, Offer Price, Offer Time, Expiry Time, Address, and Remark. Upload a file and click Save to upload the offer successfully.
Note: Offer file must be uploaded and limited to under 5 files.
Selling Statistics
When you sign a house selling agreement with a user, you can create a house selling demand for this user. This will record all the data of the house during the time period you specified, such as the number of page views and requested viewings, as well as data such as the number of offers received.
Click on the + button to Edit and Add a Listing Contract.
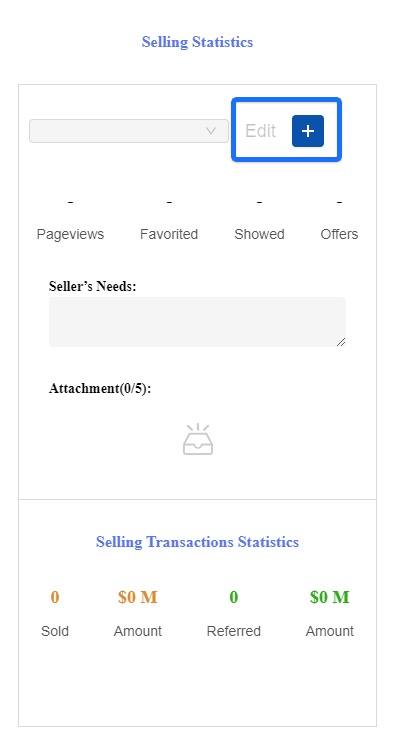
Enter the Title, Start Date, End Date, Type, MLS® Listing ID, and Seller’s Needs. Upload a file and click Save.
Note: If the listing is not uploaded, the listing management needs to be associated after uploading the listing. The associated house listing should belong to the user.

Latest Messages
View all recent communications with the user with the Subject, Date, and Status displayed.
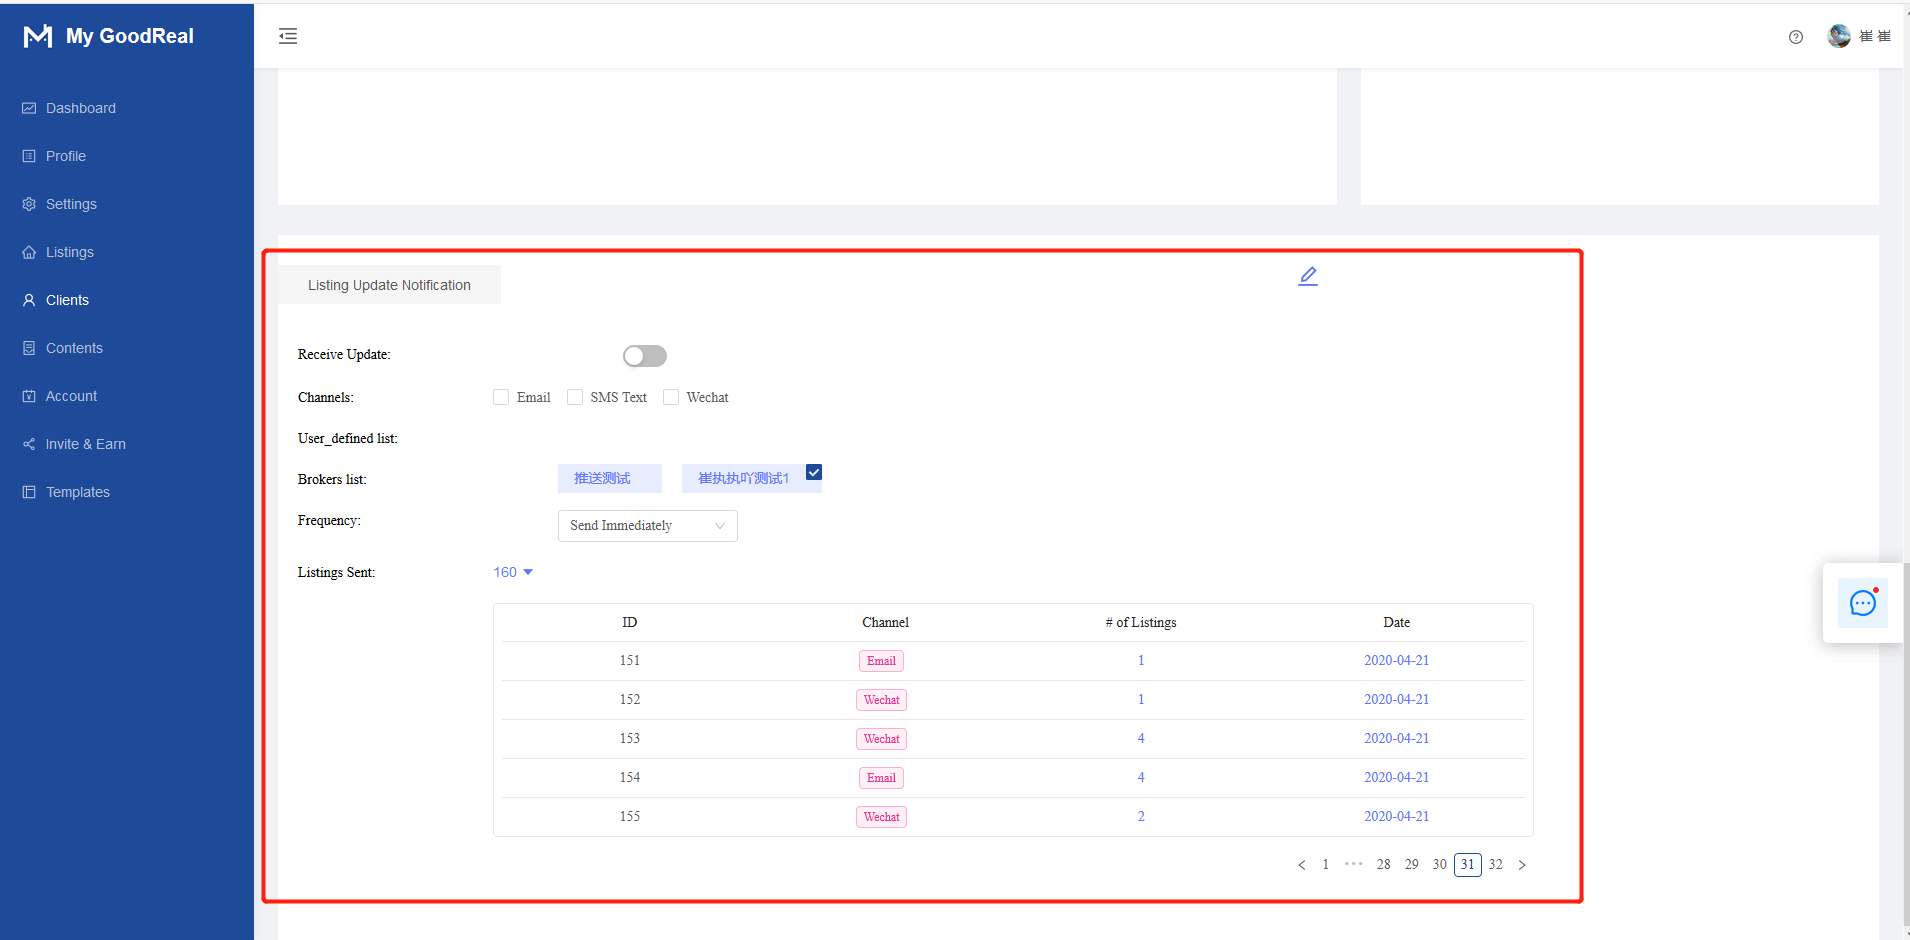
Notification Settings
The user can be configured to automatically update the listing email.
Configuration process: Toggle on to Receive Update. Select the Channel (Email, SMS, Text, WeChat) and Brokers List. Choose the Frequency in the dropdown menu. After saving the settings, a notification will be sent to the user if there is a listing update in the selected list.
Note:
- There are two push lists, one is created by the user and the other is created by the broker for the user. In order to prevent a lot of costs due to configuration errors, there is only one list that can be selected to push.
- If the user does not have a list, the agent can go to the property management to create a list to associate the user.
Comments
0 comments
Article is closed for comments.